

Whether you already have a trampoline or you’re thinking of purchasing one, you probably have questions about assembly and disassembly. Putting the trampoline together is obviously something you must do when you first get the trampoline. Depending on where you live, the trampoline may have to be taken down for winter. So, without further ado, read on to get all your trampoline assembly and disassembly questions answered.
Assembling a Trampoline
First, let’s jump into trampoline assembly questions.
How Long Does it Take to Assemble a Trampoline?
The number of people helping you and the size of your trampoline will affect how long it takes to put together a trampoline. Two people can assemble most trampolines in about two to three hours. For larger or springless trampolines, this could be more like 3 or 4 hours.
It is difficult to assemble a trampoline?
Most trampoline manufacturers make assembly as easy as possible. It is technically not difficult to put together a trampoline but it takes some effort. It can be tricky to get all of the springs on, but if you have the right tools it’s not too difficult.
The more people you have to help, the easier it is to put the trampoline together. Even if your trampoline has a safety enclosure net it can be time-consuming to assemble it. You can hire someone to put the trampoline together if you aren’t feeling like assembling it yourself.
Can You Assemble a Trampoline By Yourself?
It’s possible to put a trampoline together by yourself, but you will be better off using at least one other person. This is because it might take one person for the frame to be erected and another to complete its assembly. It may take you longer to put it all together.
What tools are required for trampoline assembly?
The tools you need for trampoline assembly are pretty basic. These tools will vary depending on the trampoline, but they are usually tools that come with the trampoline itself or you already have at home. These include:
- A Drill
- A Phillips Drill Bit (Or Phillips Screwdriver)
- A Rubber Mutton
- Work Gloves
- Spring Puller
Be sure to check your trampoline’s instruction manual for specifics. For some trampolines you may need a socket wrench. Before you start assembling, it is best to make sure you have all the tools you will need.
You shouldn’t use a regular or regular hammer to replace a rubber mallet. However, regular hammers can cause trampoline damage.
Is it possible to place a trampoline anywhere?
Before you begin assembly, it is crucial to decide where your trampoline will be placed. To help you choose the best place for your trampoline, there are a few things to keep in mind.
First of all, your trampoline needs to be placed on flat, level ground. It is also crucial to make sure there is sufficient clearance around your trampoline. The trampoline should be placed at least six to eight inches from any objects, or anything that could harm someone who falls off. This includes space between fences, buildings and trees, as well as boulders, trees, rocks, or any other type landscape architecture.
Overhead clearance is also essential. This includes clearance at least 24 feet above the ground. Avoid tree branches and power lines, awnings, and any other objects that could cause injury to jumpers.
Should You Anchor Your Trampoline?
Not every trampoline needs to be anchored, but if you live in an area that has regular storms or high winds, you should definitely anchor your trampoline. Without anchoring it securely to the ground, it could cause damage by slamming into a house, a fence, or power lines.
If you are unsure whether to anchor the trampoline, it is a good idea not to. Instead, use a kit that will anchor the trampoline. Some trampolines have an anchor kit that comes with them, but most times you’ll need to buy it individually.
How to Anchor Your Trampoline
There are a couple of different options for anchoring your trampoline down to protect it from blowing away in a strong wind. These include wind stakes and ratchet-style trampoline spikes.
Ratchet-style trampoline spikes use pickets you can drive into the ground, then attach to the legs. Wind stakes can be a bit simpler. They’re usually U-shaped and designed to be hammered into the ground over each of the trampoline legs, thereby keeping them from lifting up in a strong wind.
How do You Assemble A Trampoline?
If you can’t seem to locate your trampoline’s assembly manual and you can’t find one online, you can still figure out how to assemble it. The majority of trampolines are assembled in the same way. These steps will help you to assemble your trampoline. Before you get started, it’s important to know where you’ll be putting the trampoline.
Step 1: Gather Tools and Components
Ensure you have all the required tools before you begin assembly. Once you have the tools together, take the trampoline components and place them in a staging area, placing pieces of the frame in one place, the jumping mat in another, and the springs in another. This will make it easier to see the components you need as you assemble your trampoline.
Step 2: Assemble and Fasten the Frame
Put the frame together first. The best way to do this on most trampolines is to first assemble the top and then attach the legs. It is a step that can be made easier if you have someone to assist. Once the frame is assembled, secure it with the hardware.
Step 3: Attach the Springs and the Jumping Mat
After the frame is fully assembled, it’s now time to attach springs and the jumping pad. If your trampoline comes with an enclosure net that must be secured over the triangle rings of your jumping mat, attach it now.
You can attach each spring around the mat to make things easier. The first round of attaching the springs around the mat will be the easiest, since there won’t be as much tension on them. The more springs that you attach, the harder they will get. The rubber mallet and the spring puller can be used to attach the springs. You can also attach a spring to the springs if you don’t have a spring pulling tool.
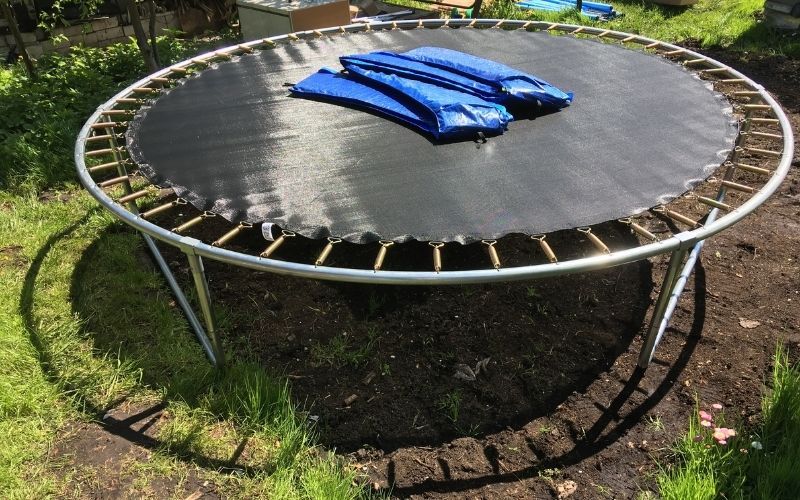
Step 4: Spring Pad & Enclosure
After you’ve attached the springs, attach the spring pad. At this point, attach the enclosure net. Each enclosure net is different, so it’s important that you follow the instructions to get the best results.
Disassemble a Trampoline
Let’s now take a look into common trampoline disassembly queries.
How long does it take for a trampoline to be disassembled?
Taking your trampoline apart usually takes anywhere between 2 and 4 hours. It all depends on the trampoline type, its size, the tools available, and the availability of another adult to assist you.
What tools do I need to disassemble the trampoline?
These tools are the same ones you’d need to disassemble your trampoline. These are:
- A Drill
- A Phillips Drill Bit (Or Phillips Screwdriver)
- A Rubber Mallet
- Work gloves
- Spring Puller
Depending on the type and configuration of your trampoline’s hardware, you may also need a crescent wrench or socket wrench.
Do you have the ability to disassemble a trampoline yourself?
While it is possible to disassemble the trampoline without assistance, it is not recommended. The best way to take a trampoline apart is with two people. It is easier and more labor-intensive to do this by yourself.
Is it Hard to Take a Trampoline Apart?
It’s not difficult for a trampoline to be taken apart. It is labor-intensive but not difficult. It’s not difficult to do once, and it won’t be hard to do again. If the trampoline is not in good condition, it shouldn’t be difficult to take apart.
Can you move a trampoline without taking it apart?
A trampoline can be moved without disassembling. If you don’t have it to move very far, it shouldn’t be a problem. There are several ways to move a trampoline without taking it apart and several reasons why you may want to.
Moving a trampoline for yard work is the most common reason. To keep your lawn lush and green, it is a good idea periodically to move the equipment. However, it is not necessary to disassemble it each time you want to transport it. Luckily, you don’t have to.
- Trampoline Lifting
- Three or four strong, experienced helpers should be gathered and placed equally around the trampoline. Have everyone lift at once and carry the trampoline to an out-of-the-way, nearby location.
- Use wheels
- You can attach temporary wheels to the trampoline in order to help move it. You might be able to move the trampoline yourself if you don’t have anyone else.
- Slide the Trampoline
- You may be able to slide the trampoline a few feet if the grass is slick enough. This takes some muscle, so take care!
- Rolling the Trampoline
- If all else fails, roll the trampoline onto its side. This works only with round trampolines. You will need several strong helpers and should be used only as a last resort. It’s the riskiest and most dangerous way to move a trampoline without disassembling it. The frame could be damaged.
There are several reasons why you might need to disassemble a trampoline
Trampolines will withstand most weather conditions. However, if you live in a place that gets lots of snow, extremely cold winters, or high winter winds, you may want to disassemble the trampoline before winter hits and then put it back up when spring brings warm weather.
If you need it to be moved further than a small distance, the trampoline will need to be disassembled. Most often, this is necessary when you’re moving from one home to another. If you’re trying to transport your trampoline for a long distance without taking it apart, it could be dangerous.
How do you disassemble a trampoline?
Here’s a broad overview of how to disassemble a trampoline. While your trampoline might be slightly different from the one you have, these steps will work regardless.
Step 1 Start with the Closure Poles/Net
It’s just as important to remove the enclosure net when you disassemble a trampoline. You should start with the poles. Remove them from their places and lay them on the trampoline. Once that’s done, you can separate the poles from the net or keep them together — whichever makes things easier on you.
Step 2: Take out the spring pad
Once you have the enclosure net off, you can easily take the spring pad off. Fold it up and set it aside before moving on to the next step.
Step 3: Remove Springs and the Jumping Mat
Next comes the fun part – removing the springs. To remove the springs, you’ll need a spring wrench. You can also use other tools around your house if you don’t own one. This article provides more information on trampoline spring puller options.
Keep all the springs together and fold up the trampoline mat for storage once you’re done with this step.
Step 4: Disassemble Frame
Now, all you need is the trampoline framework. Take out the hardware that holds the frame together and then disassemble the frame. To make sure you don’t lose any hardware, keep it all together. For when you need to assemble the trampoline, it is a good idea keep all the frames together.
Conclusion
It can seem daunting to assemble and disassemble a trampoline if it’s not something you’ve done before. Both tasks can take several hours, but they are not difficult. The right tools, a little assistance, and a clear plan will make it easy to put together or disassemble your trampoline quickly. I hope this article answered all your questions regarding assembling and disassembling your trampoline.